
Getting started with the SkyMavis Developer Portal - NO CODING (For now👀)
The SkyMavis team just recently released the SkyMavis Developer Portal. Join me in exploring it and learning more about how you could get started building on top of the Ronin and Axie ecosystems.

What is the SkyMavis Developer Portal?
The SkyMavis Developer Portal is a platform where developers and builders in the space could get started building games, applications, tools, and much more on top of the Ronin and Axie Infinity ecosystems using the API references, resources, and support provided on the portal.
You could utilize the endpoints provided on the API references to maybe build Axie management tools, mini games, or applications, and the sky's the limit as to what you could possibly build using the SkyMavis Developer portal. to give you more ideas as to what you could build using this portal. You may check out the sample builds from the community, such as the Axie Mixer Playground and Flappy Axie.

How do I get started with the SkyMavis Developer Portal?
As this would be our first interaction with the SkyMavis Developer Portal and with the Ronin Network, I would also include here how you could create your own wallet in the Ronin network, as it would be something that we would heavily use as we go through our building journey in the Ronin ecosystem.
Most of the interactions that we will do are for reasons of building and development, so I highly suggest that you already use a laptop or desktop (as it would be a challenge for you to code on your phone later, but no coding on this walkthrough).
Getting started with Ronin Wallet?
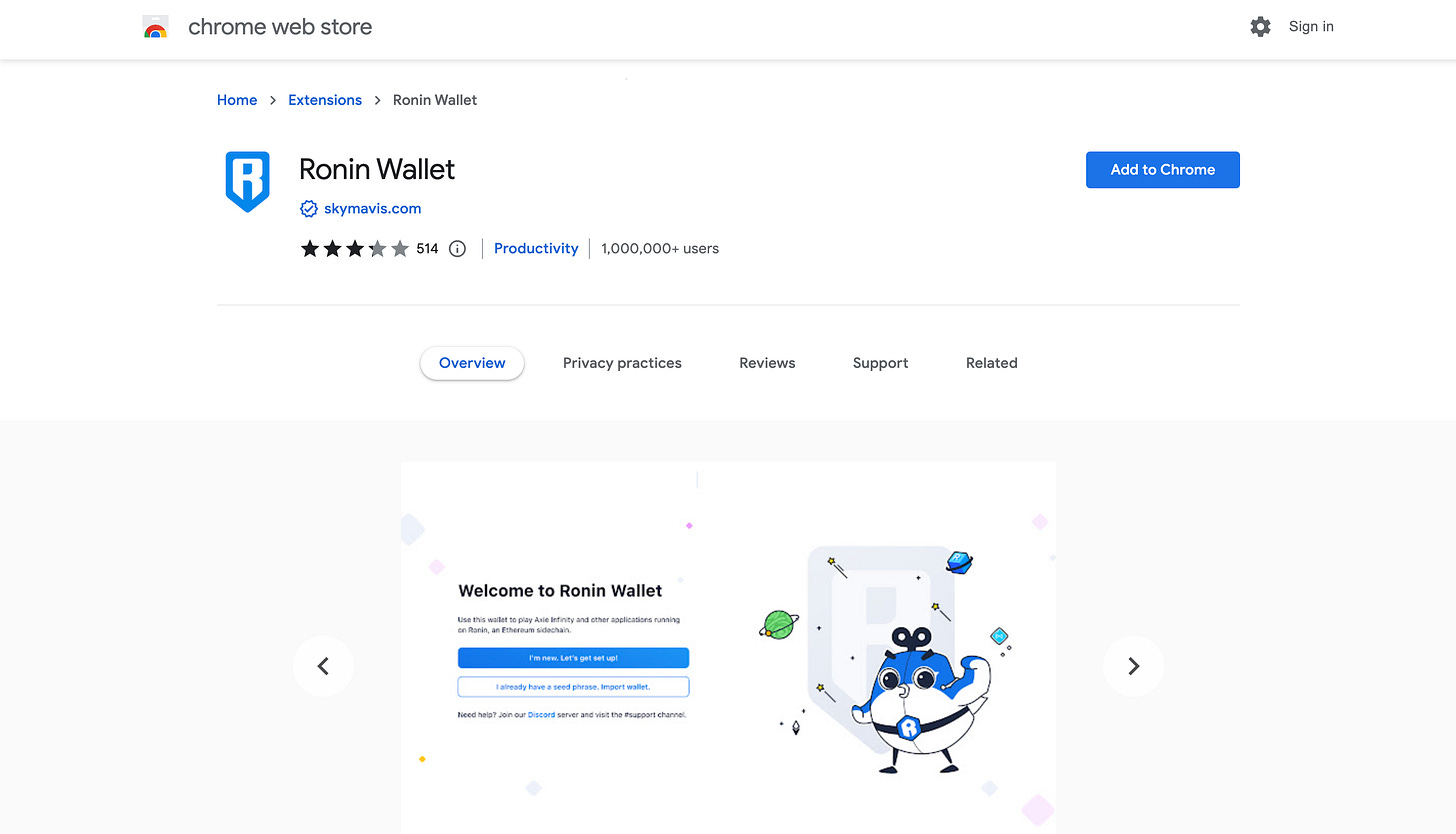
First, we would need to add the Ronin wallet extension to our browser. Feel free to use this link to make sure that you download the right one.
Official link: https://wallet.roninchain.com/
Open your Ronin wallet extension, and you would need to either create a new wallet or import your existing wallet using your secret recovery phrase or seed phrase. You may hit "I’m new. Let’s get set up!" to create a new wallet.

You would need to create your own password (the strongest password you will ever have💪). You will be asked to save your secret recovery phrase or seed phrase. Make sure that you save and secure this by writing it on paper instead of just copying and pasting it or taking a picture of it.
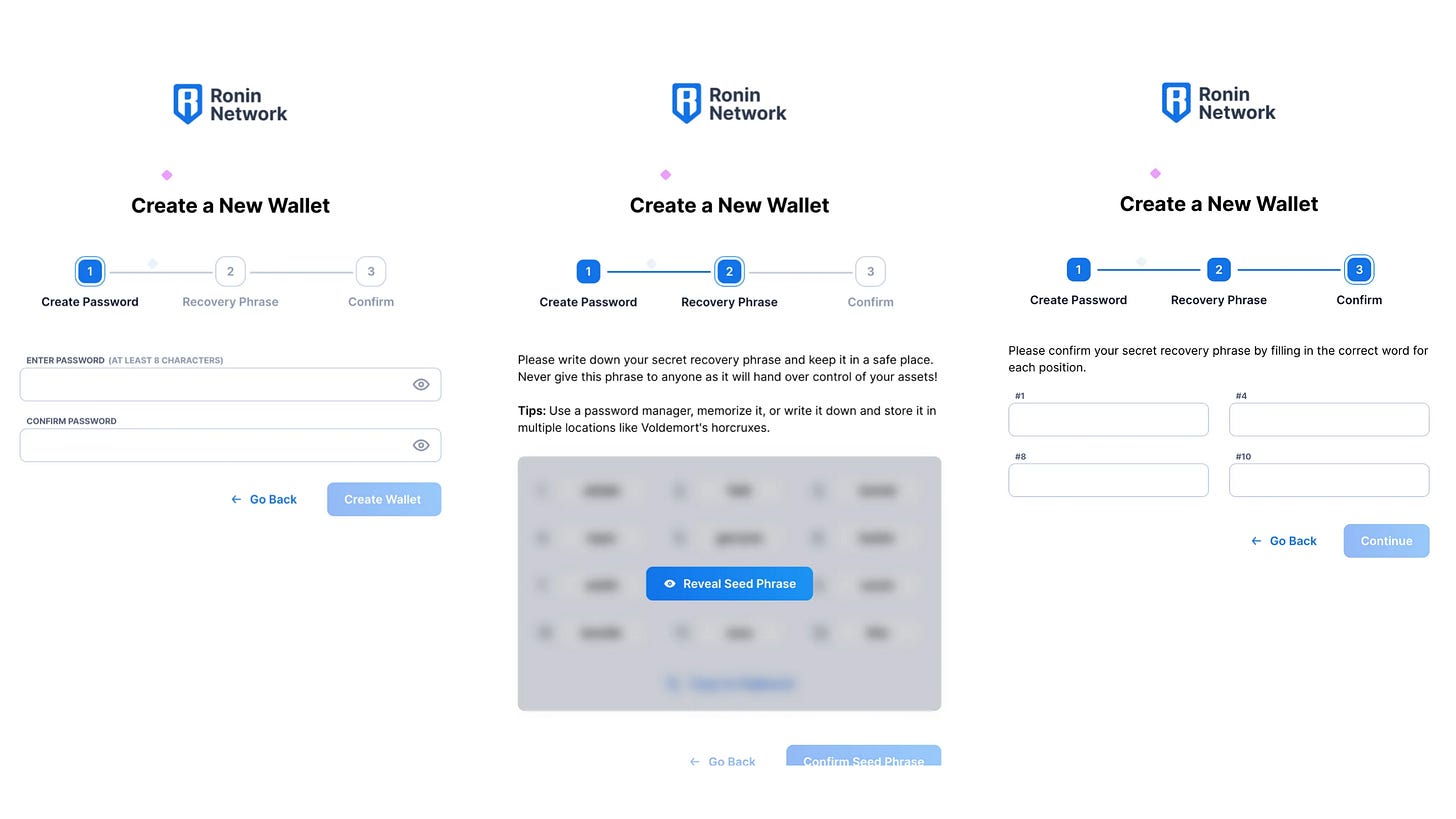

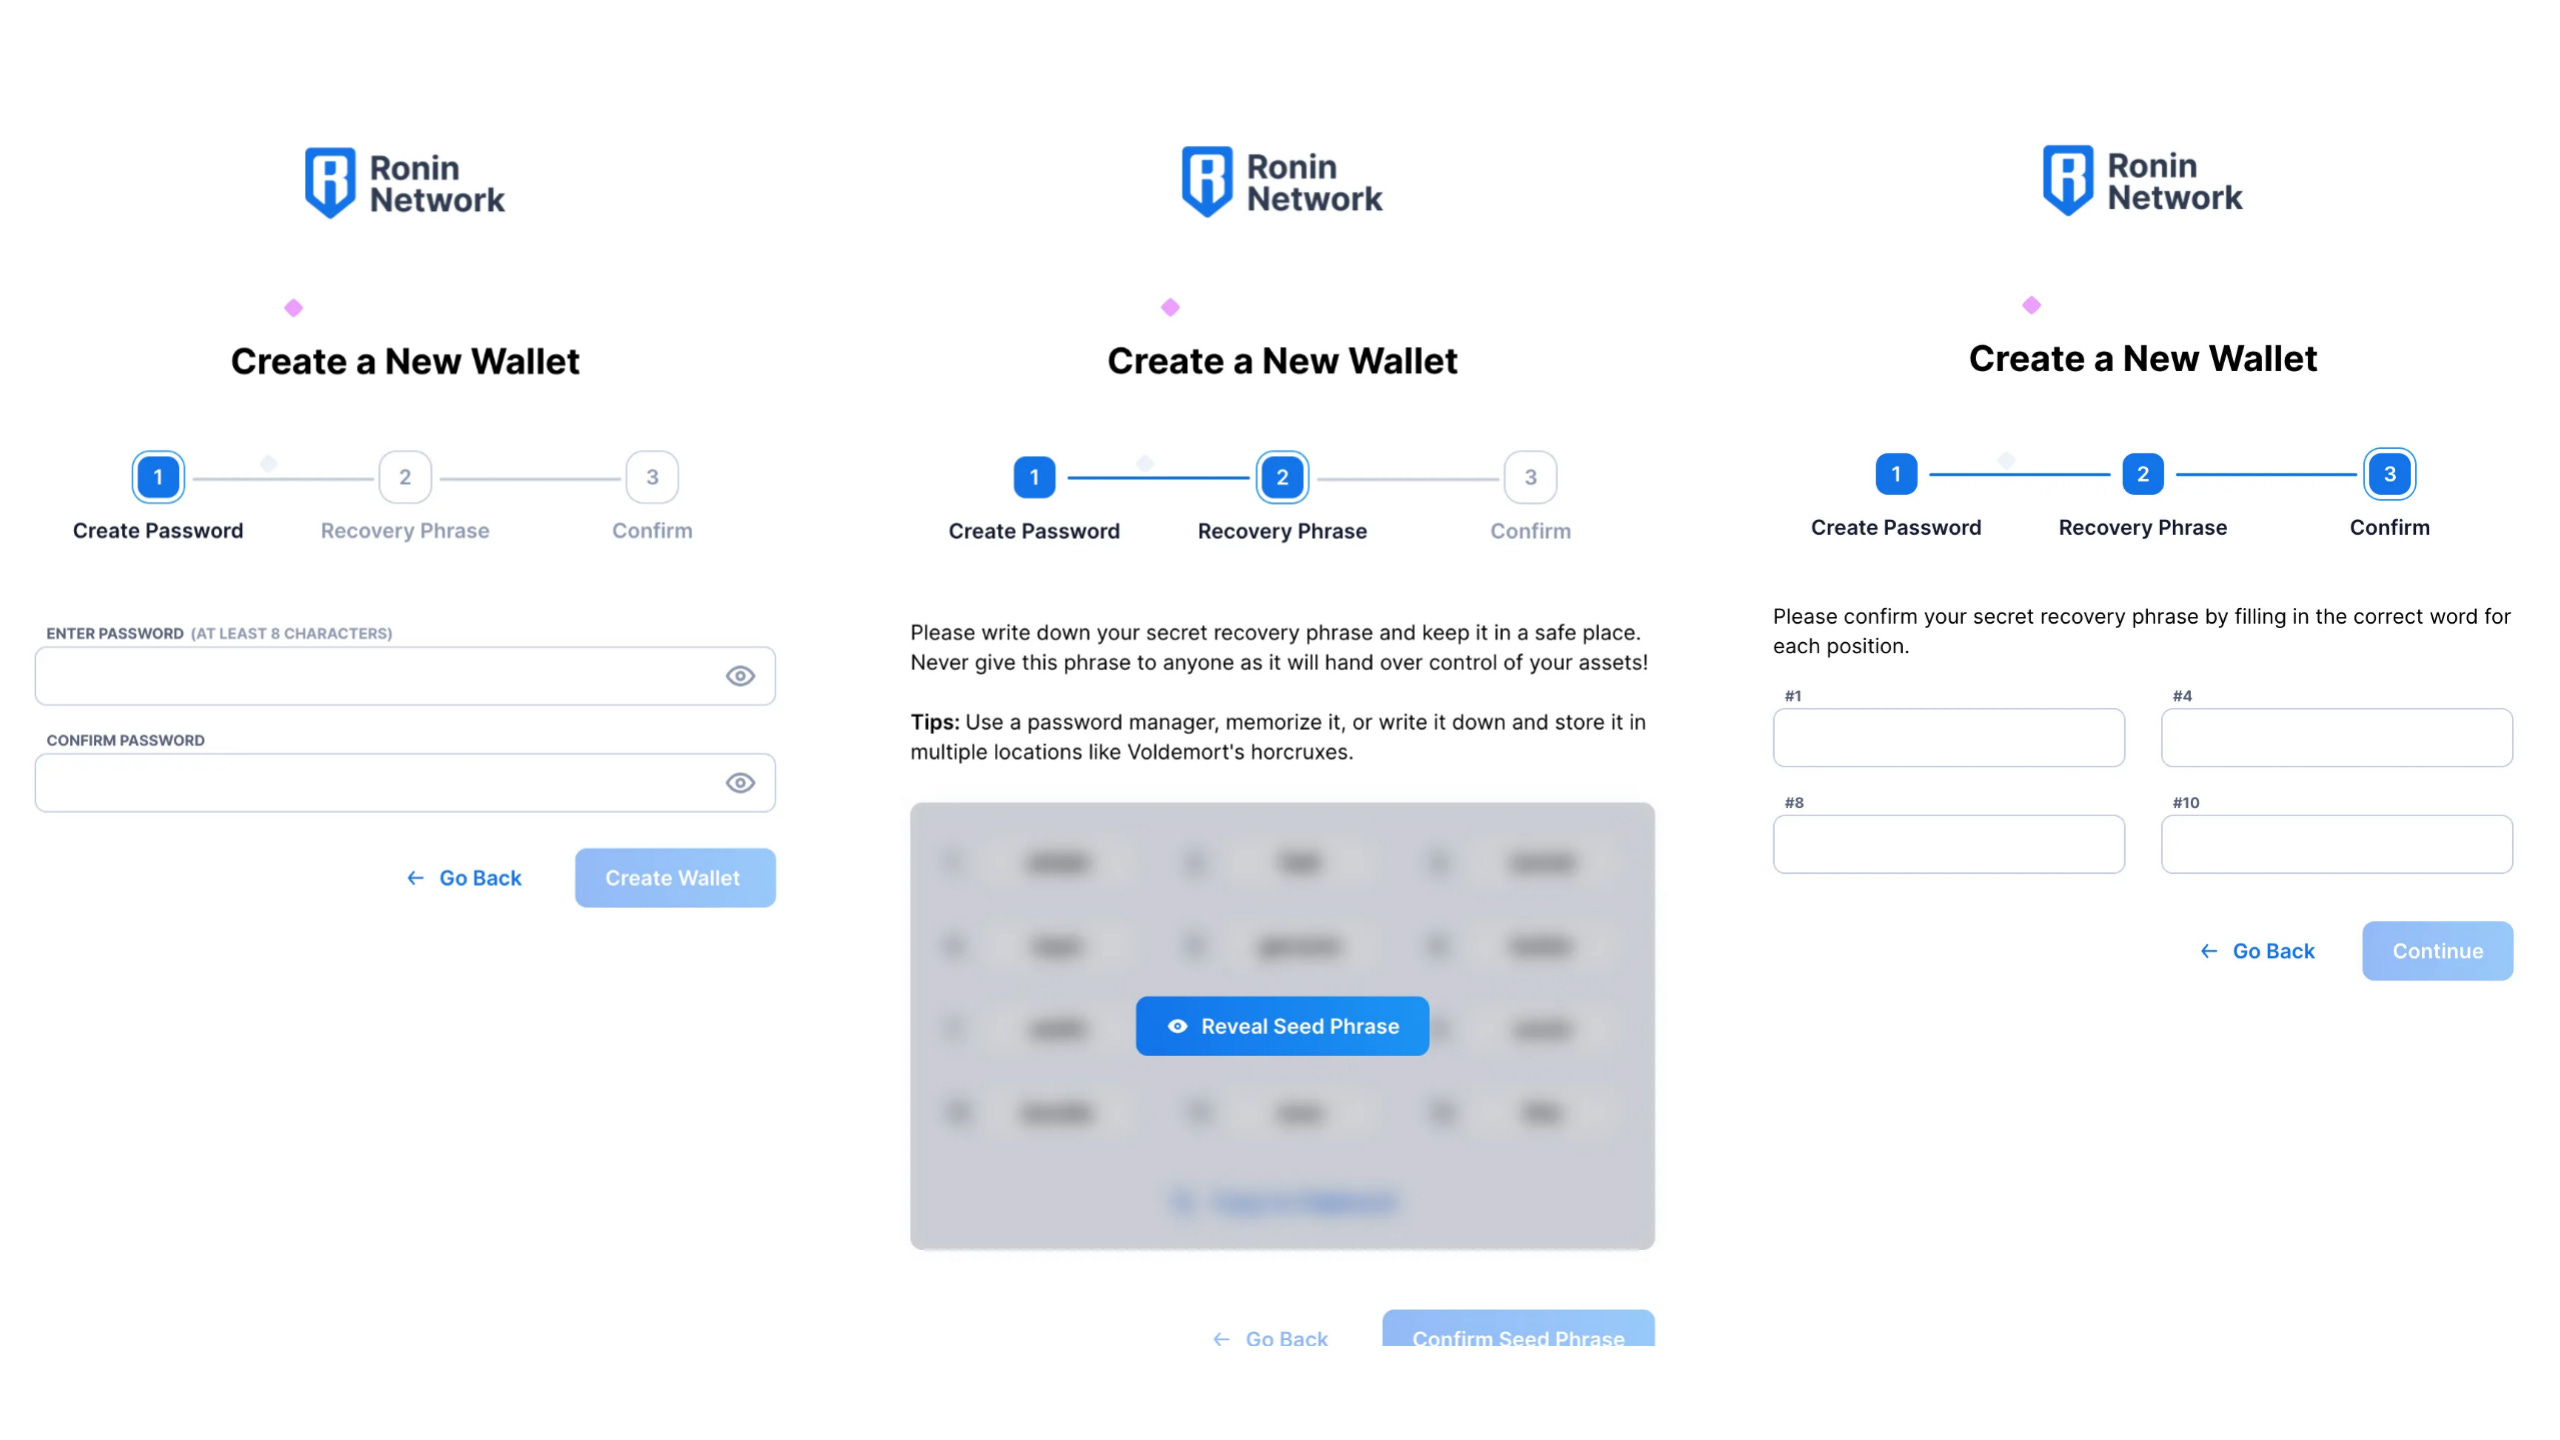
(They will be asking random words out of your seed phrase, so make sure that you really save it.)

Then that’s it! You already have your own Ronin wallet! It’s just that simple!🥳🎉
Navigating through the SkyMavis Developer Portal - The FUN part! 🧰
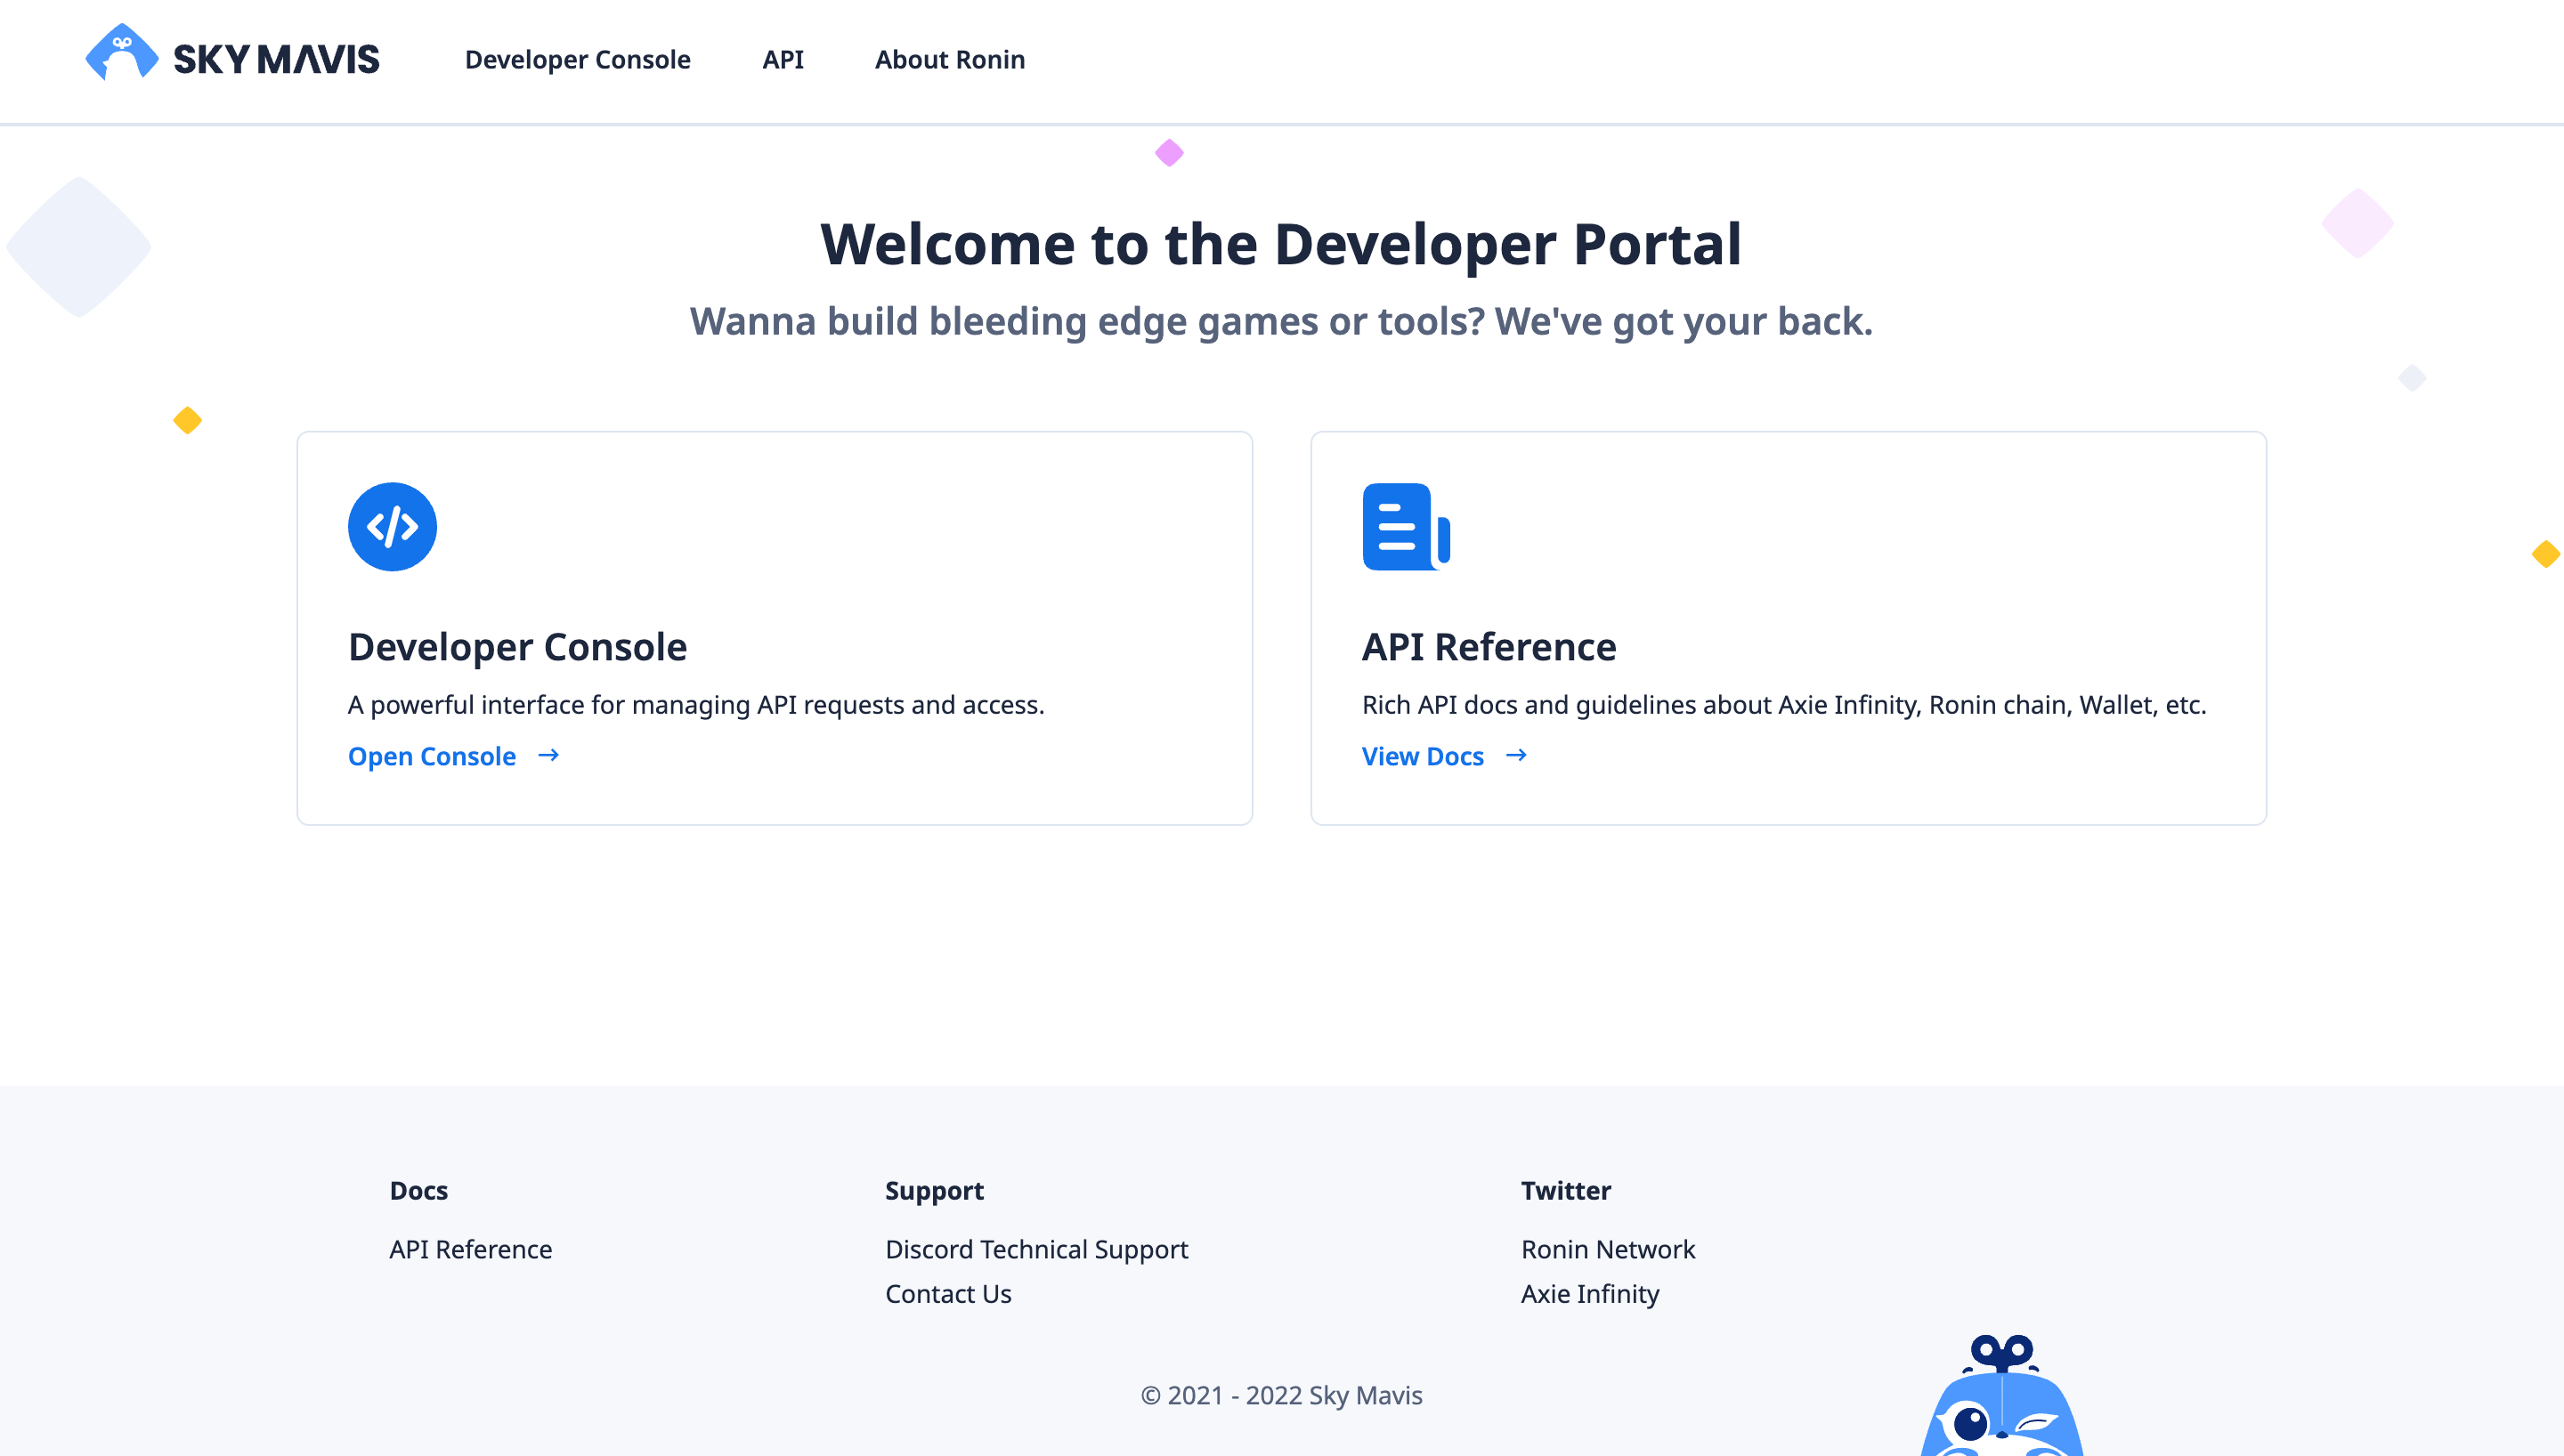
Now let’s head on to the SkyMavis Developer Portal using this link (developers.skymavis.com). Click on "Developer Console," as we don’t have any applications yet.

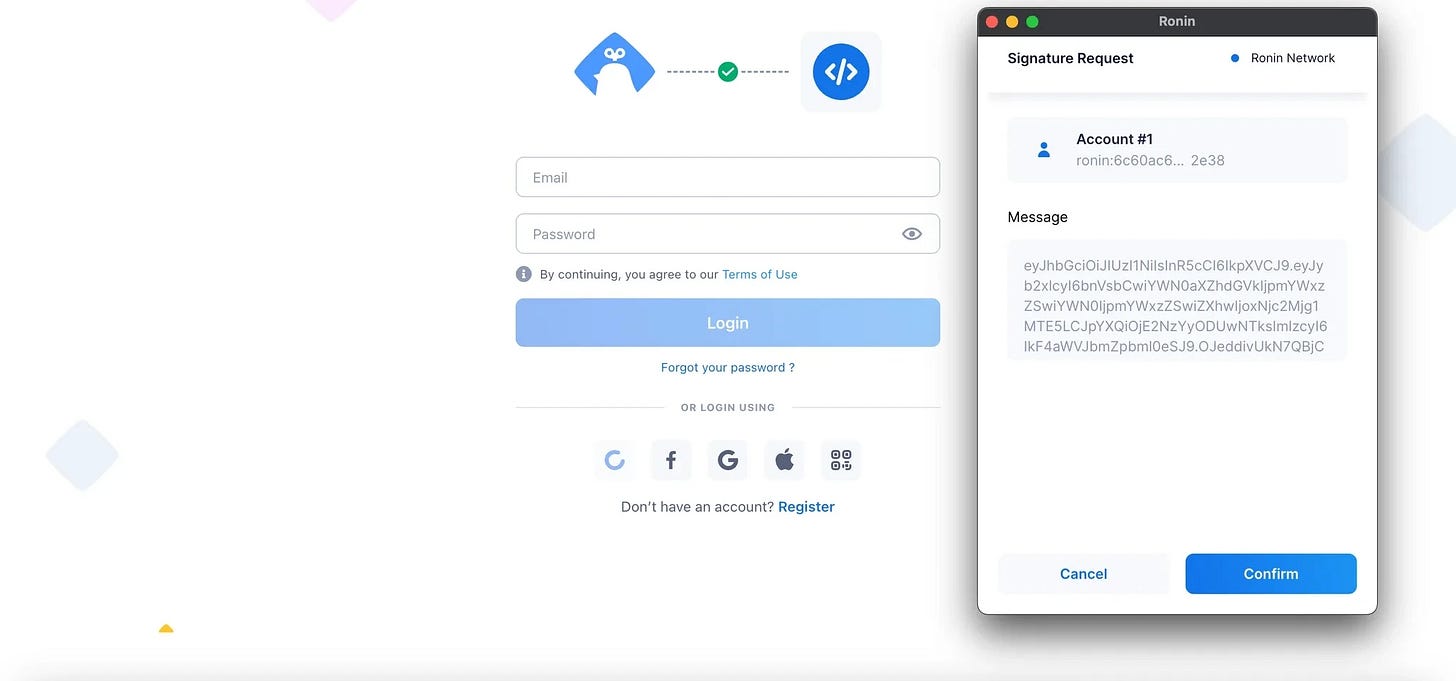
Follow the on-screen instructions for logging in through the portal. The good thing about already creating your ronin wallet is that you could use it as a way of logging in to this portal. So just click on the Ronin icon and sign the message from the wallet (Yes it’s safe! No need to worry.)
After logging in, we are now ready to create our first application using the developer console. Start by giving your application a name.
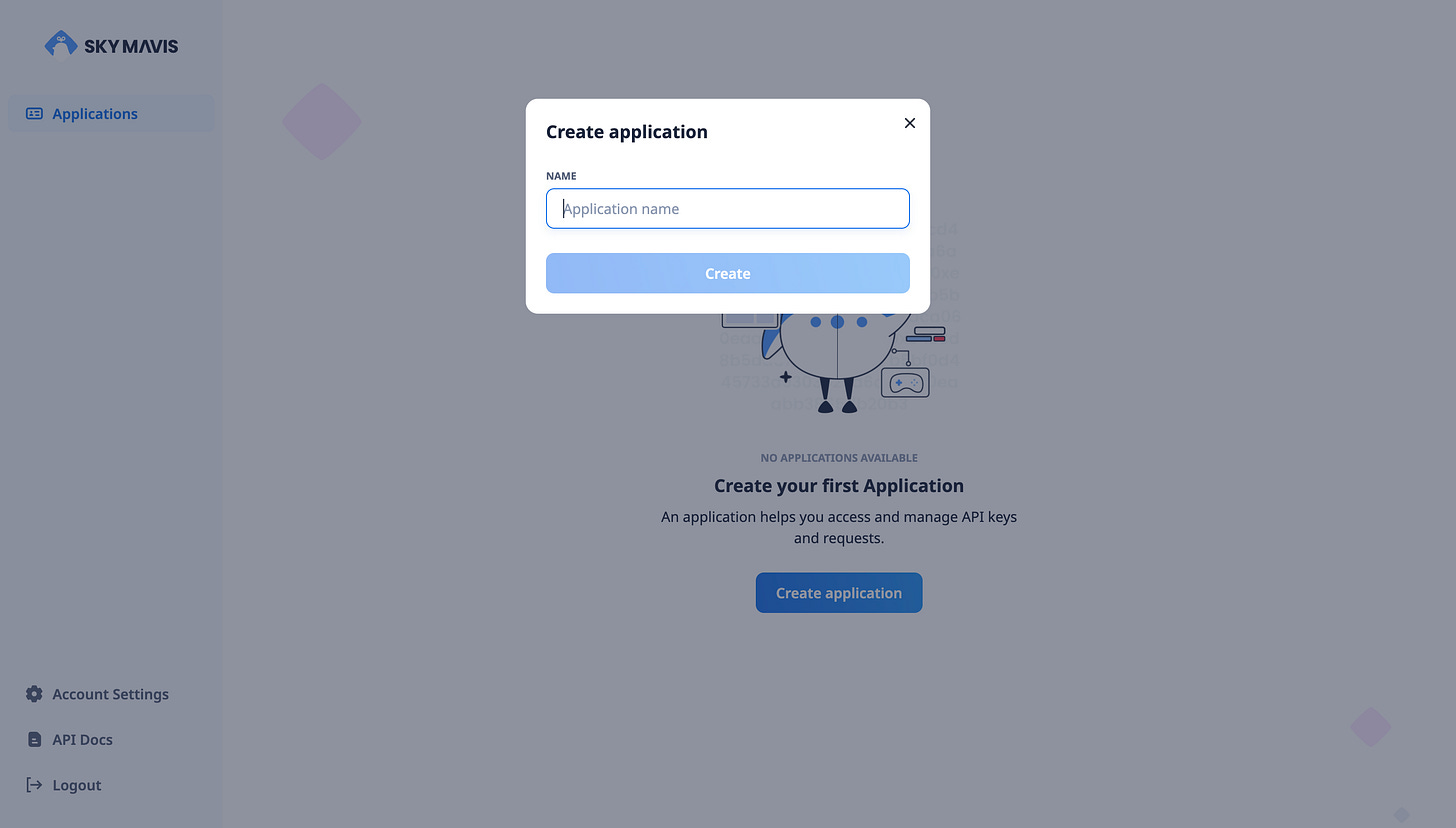

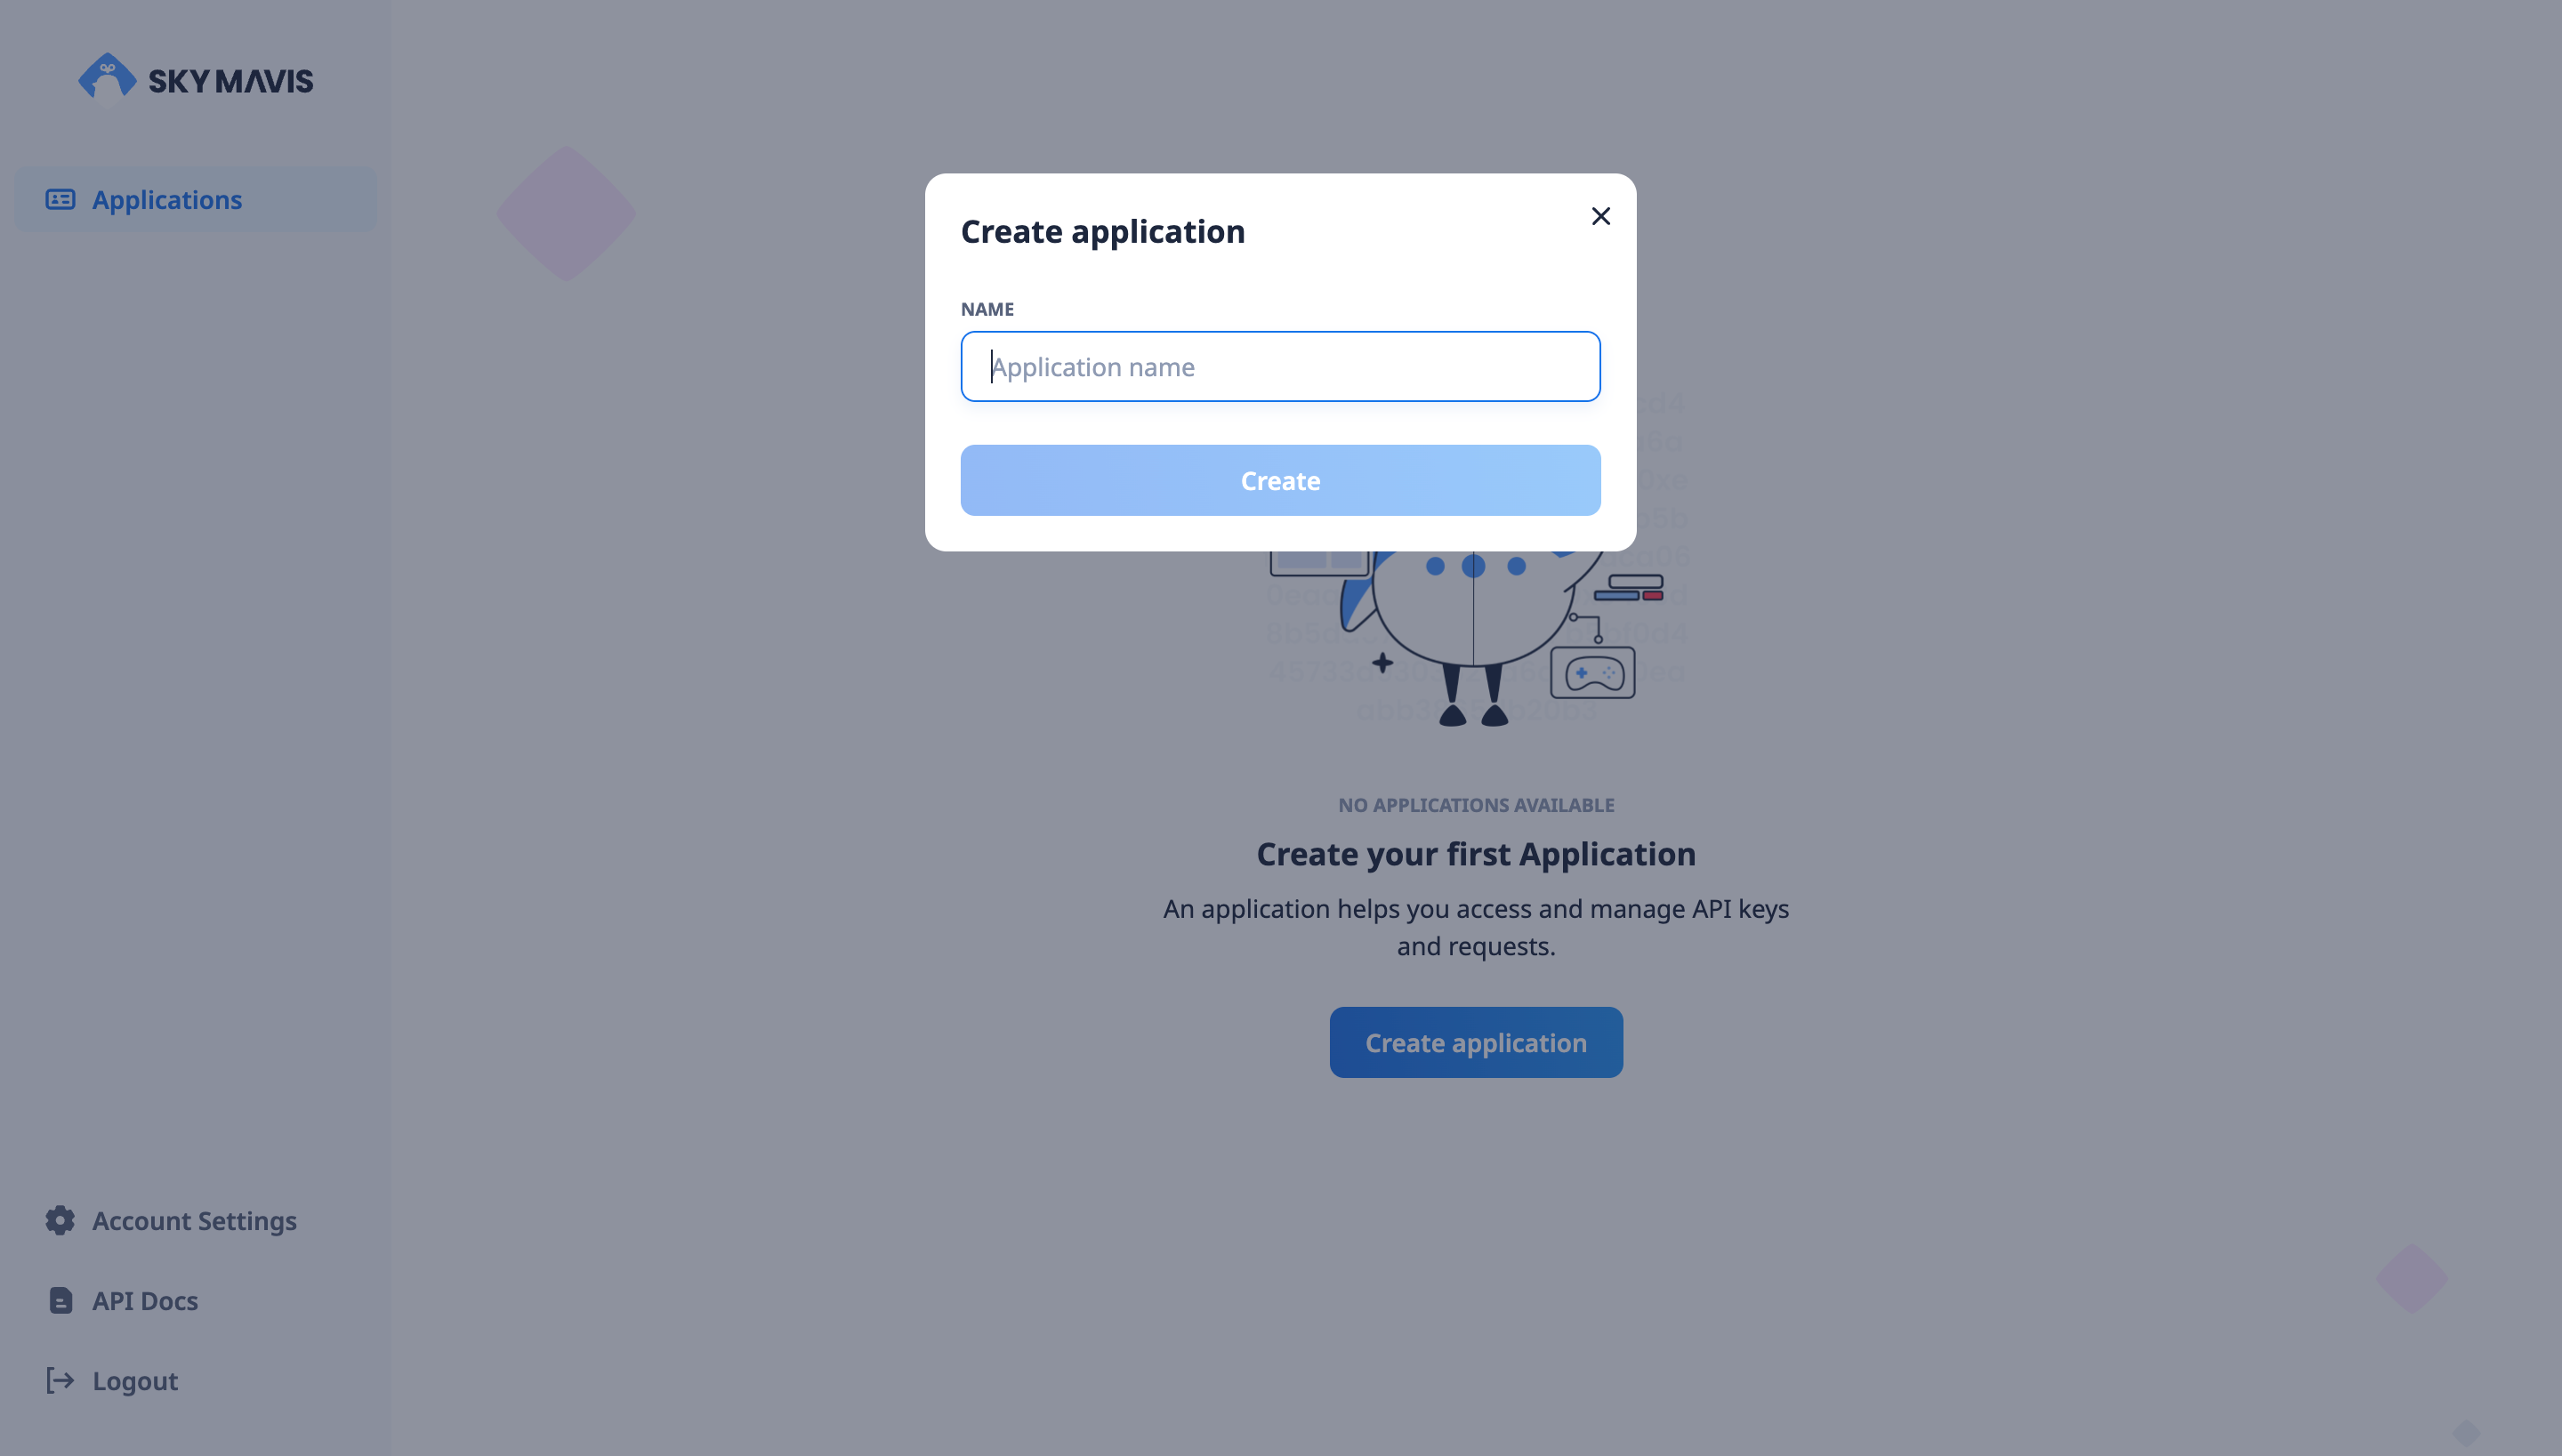
(you could change this anytime, so there's no need to overthink).

Then that’s it! You already have your first application, and you are now ready to BUIDL on top of the Ronin and Axie Infinity ecosystem🥳🎉
Exploring the Developer Console
So let’s quickly navigate through and familiarize ourselves with the different parts of the Developer Console, as we will be spending some time here in our building journey.
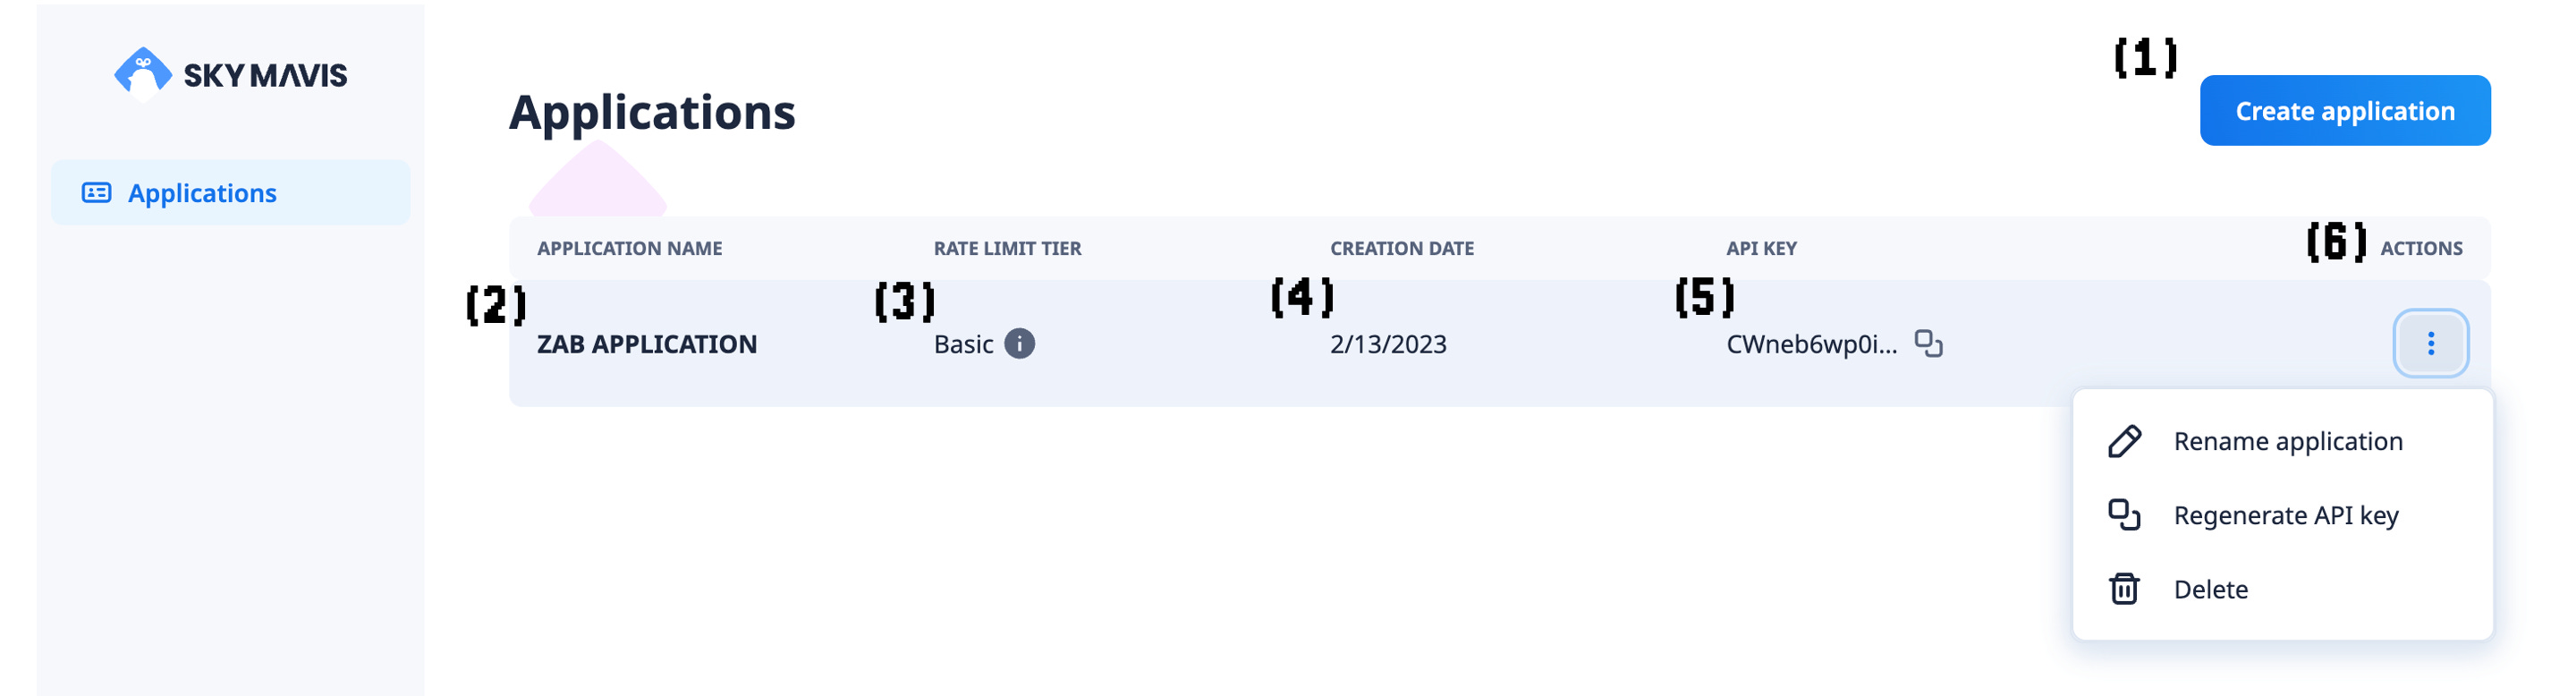
(1) CREATE APPLICATION - Click this to create more applications within the developer console. (In this case, more Zab applications, please.)
(2) APPLICATION NAME - This is the name you give to your application. You could change this anytime you wish by going to the "Actions" menu on the right side and clicking on "Rename application." (The application name should be at least 5 characters long, and you can’t use the name you already used for your new applications.)
(3) RATE LIMIT TIER - This is the "tier" that you currently have for your application, so in this case, I have the default tier, which is "Basic," but depending on your technical requirements, if you would need more requests or calls, you would need to email developersupport@skymavis.com to upgrade your tier.
(4) CREATION DATE - Simply the date you created a specific application.
(5) API KEY - This would be your unique identifier, or "key," of your application, which you would use to perform requests and calls to the endpoints later. API stands for Application Programming Interface, and these are used to connect one application to another and be able to bridge data, features, and functionalities.
(6) ACTIONS SECTION - This is the one with the "kebab" menu, and you could click this to see three additional options for your application. The following are: "Rename application" to change the name of your application. "Regenerate API key" to generate a new API key for your application, and "Delete" to delete that specific application (this can’t be undone, so be careful).
Let’s have some fun and wear our hard hats, my fellow BUILDERS!👷
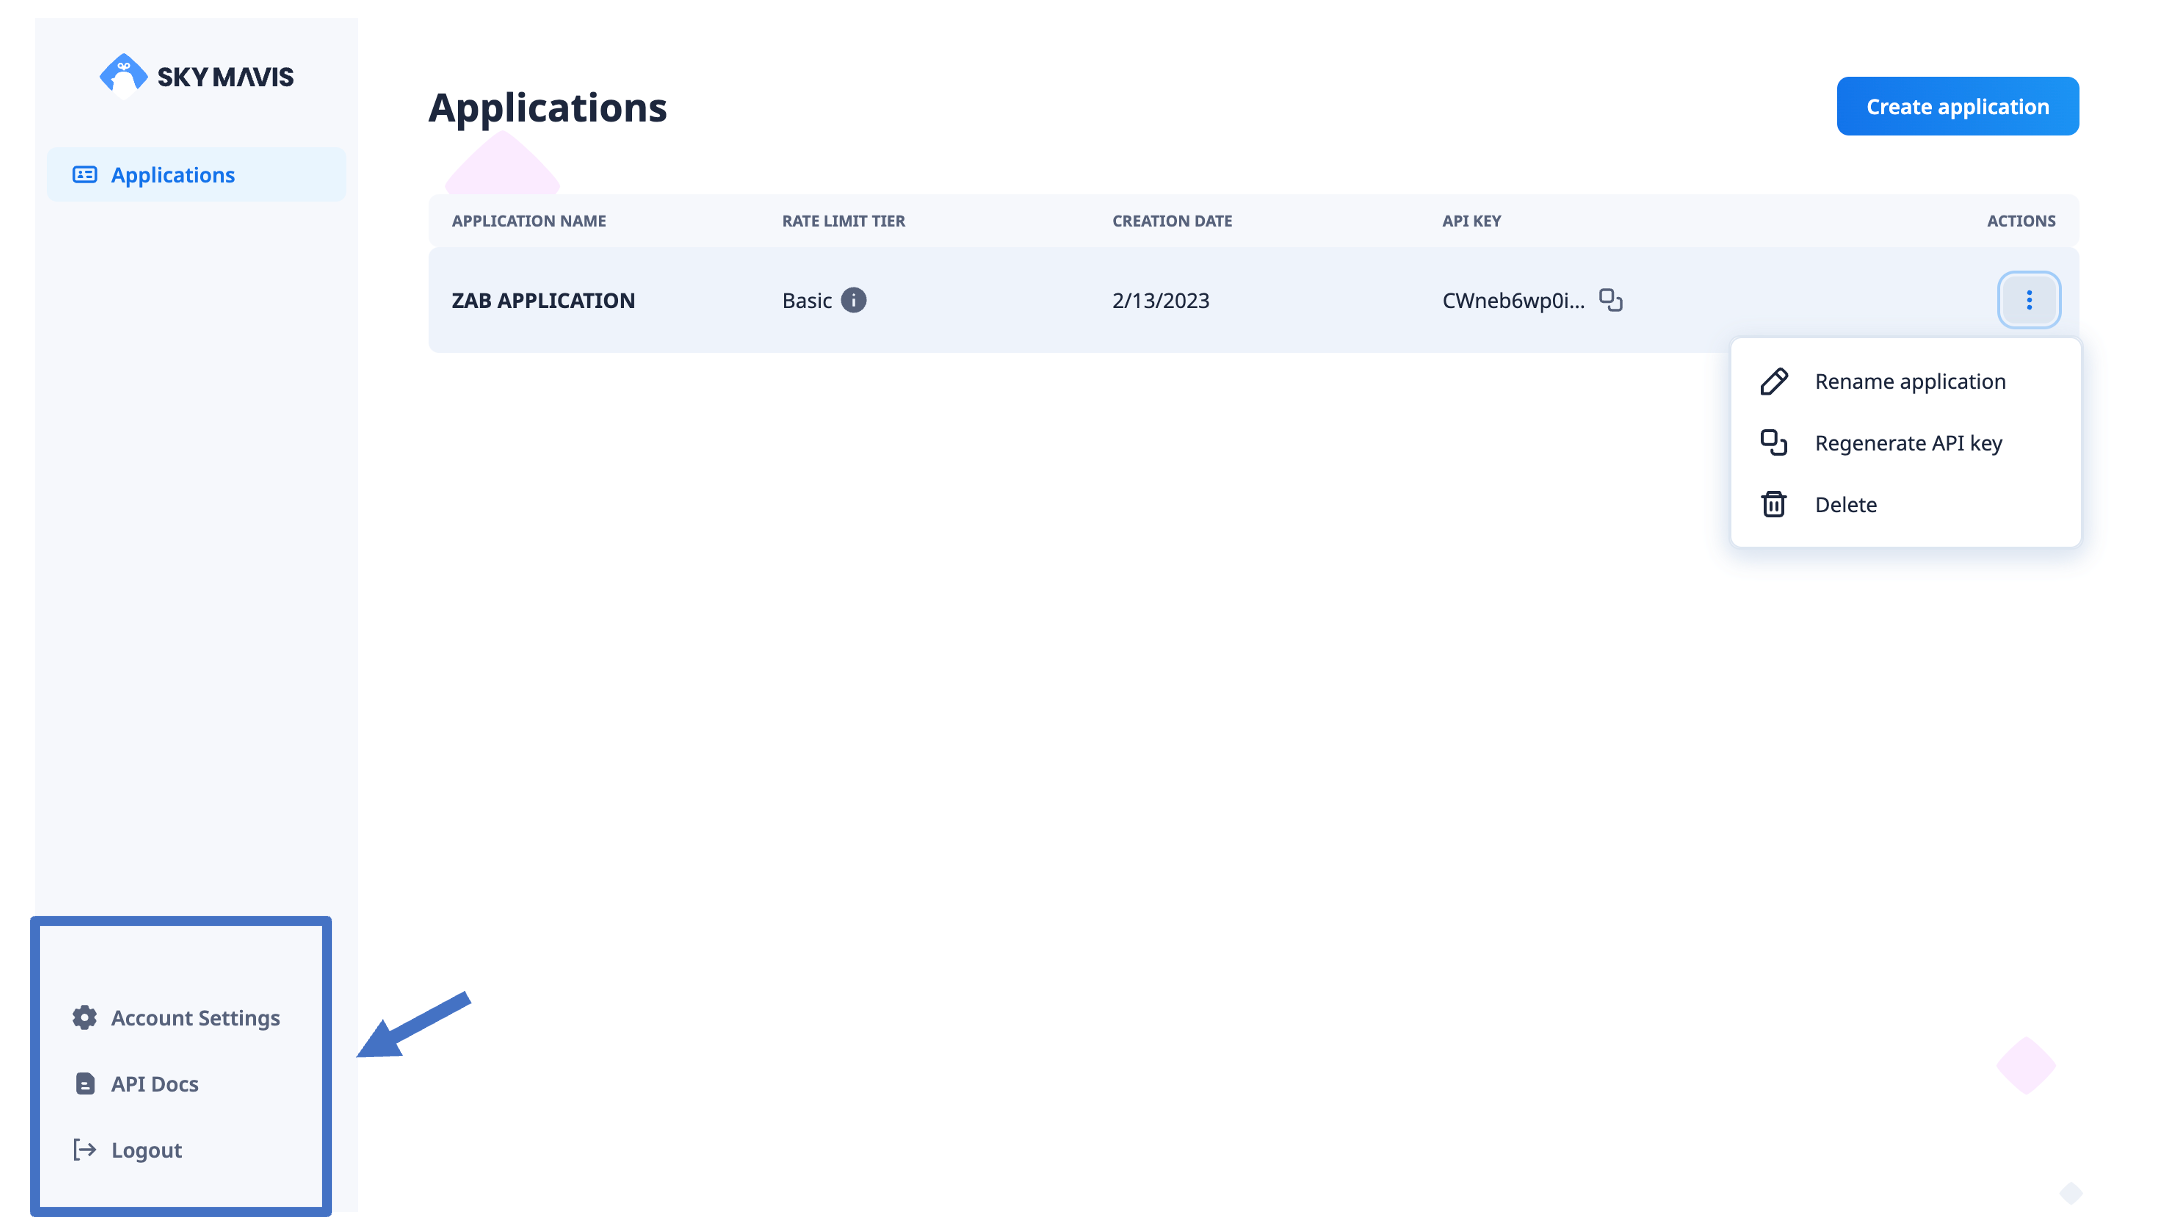
On the lower left corner of the Developer Console, we could see there are three options. The following are: "Account Settings" to go back to the login page. "API Docs" to go to the API references and documentation. "Logout" to logout of your current account in the SkyMavis Developer Portal.
Click "API Docs" so we can check on the different API references available and be able to try some of them out.
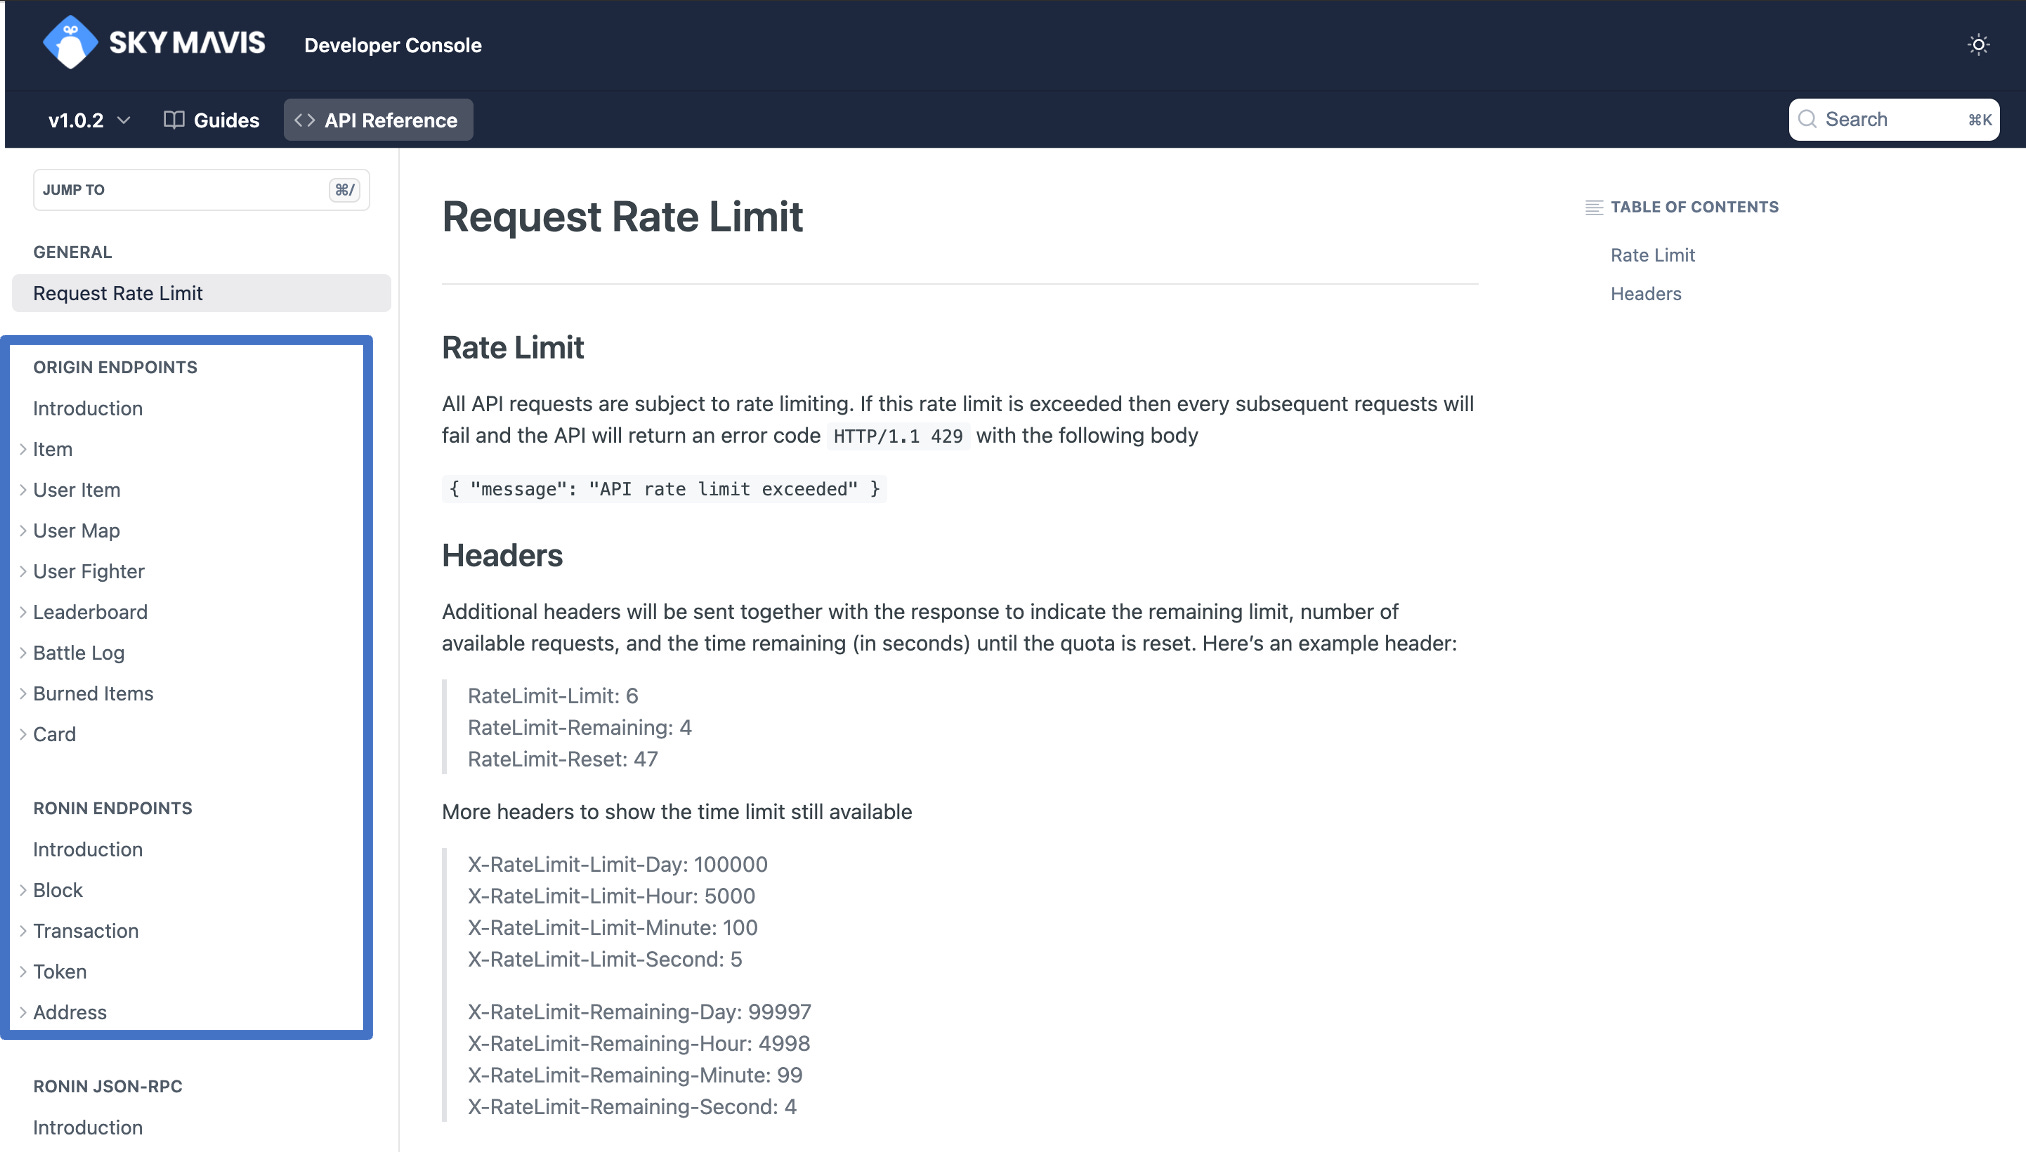
We have endpoints available for Origin that you could utilize to build Axie Infinity-related applications, mini games, and scholar management platforms. There are also endpoints available for the Ronin network, which is handy if you are building decentralized applications, account management, and monitoring platforms.

Just do remember that there is a Request Rate Limit, which is the limit to the number of requests and calls that you could have on the endpoints and is based on the current tier of your application.
There are unlimited possibilities for the things you could build by utilizing these endpoints and resources provided within the portal. You could play around as they have an option to try different endpoints; just keep in mind to fill out required fields such as user ID, time, and most especially your API key.
Feel free to check out my video below to learn more about how you could play around and test different endpoints👷🧰
Hey frens! Zab here, and I'm a Community Builder and a Developer advocate in Web3. I have worked with numerous Web3 start-ups, projects, and notable gaming publishing companies here in Southeast Asia, such as Netease and Garena. My mission is to be able to onboard more builders in the space and bridge the gap in education by introducing technical and complex Web3 concepts to beginners and students.
Feel free to learn more about me and the things I have worked on through my personal decentralized website and social media channels using the link below. You could also reach out to me if you need any help, assistance, advice, or questions related to Web3, NFTs, cryptocurrency, blockchain, or other decentralized and related technologies.
Website: https://zabdiel.eth.limo
Social Media channels: https://beacons.ai/beauzabdiel